Connect to MSU-Secure on Windows 10
Microsoft will be retiring support for Windows 10. After October 14, 2025, Microsoft will no longer provide security fixes, technical assistance, or software updates for Windows 10. Your PC will still work, but we recommend moving to Windows 11 before the change to familiarize yourself. For information, visit our news article on this change.
Follow these instructions to connect to the MSU-Secure wireless network on a Windows 10 device.
- Right-click/tap the Windows start menu.
- Select Control Panel > Network and Internet > Network and Sharing Center.
- Click Set up a new connection or network.
- Click Manually connect to a wireless network and then Next.
- Enter the following information:
- Network name: MSU-Secure
- Security type: WPA2-Enterprise
- Security key: Leave blank
- Check box - Start this connection automatically
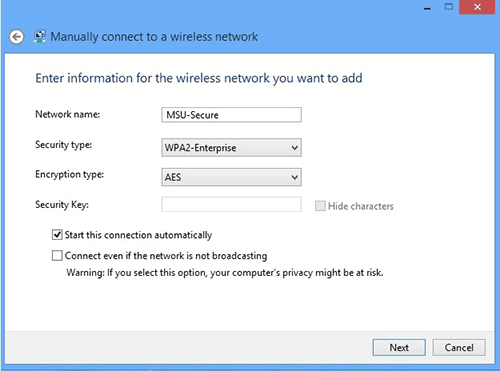
- Click Next.
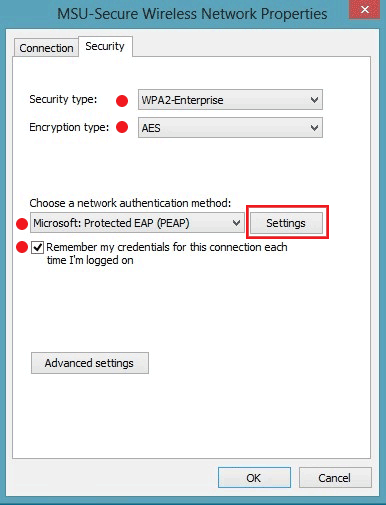
- Click Change connection settings.
- Click Security tab.
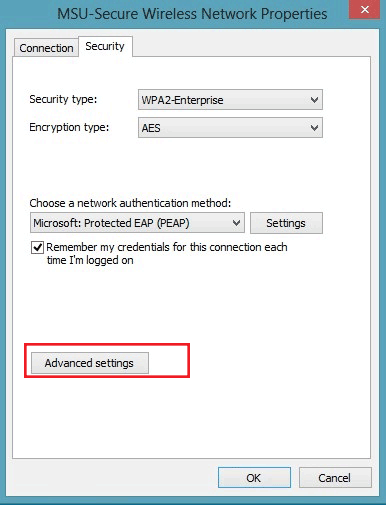
(see image below for steps 8 - 10) - Ensure authentication method is set to: Microsoft: Protected EAP (PEAP) and box is checked next to Remember my credentials...
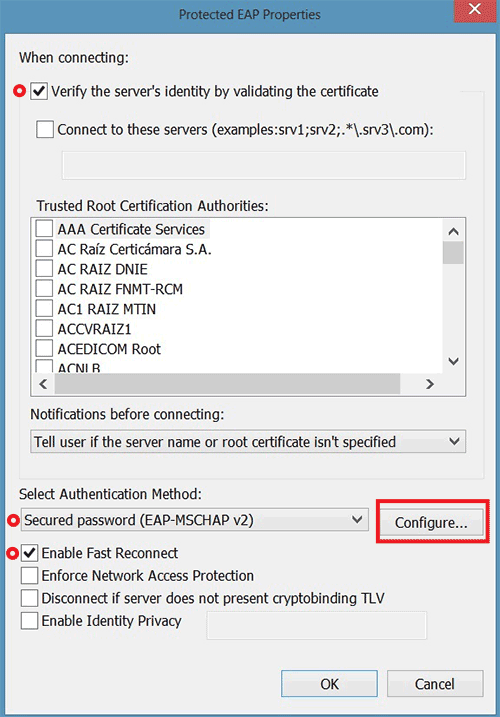
- Click Settings button.
- Ensure Verify the server's identity by validating the certificate is checked.
(see image below for steps 11 - 13.) - Ensure Select Authentication Method is set to EAP-MSCHAP v2 and Enable Fast Reconnect is checked.
- Click Configure.
- Uncheck box next to Automatically use my Windows logon name and password (and domain if any)
and click OK.
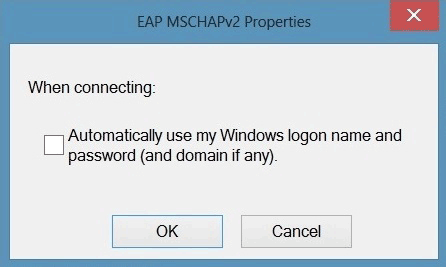
- Click OK again.
- Click Advanced Settings.
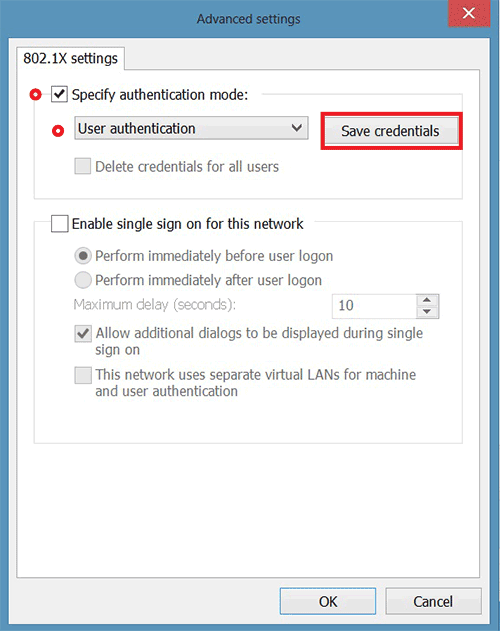
- Check box next to Specify authentication mode: (see image below for steps 17, 18).
- Select User authentication and click Save credentials.
- Enter:
- User name: NetID@student.montana.edu for students
NetID@msu.montana.edu for faculty, staff, and graduate assistants - Password: NetID password
- Click OK and again on the remaining prompts to close windows.
- Click Close.
You should now be connected to MSU-Secure and in the future you device will connect to MSU-Secure automatically.
